MDX Blog with Next.js 13 and Contentlayer (Part 3)
Minh-Tri Le on Mar 25, 2023
You can reference for setting up project and Contentlayer from Part 1 and Part 2 before continue to last part bellow.
Part 3: Build a blog
Creating a Layout
- Create Header, Footer component:
/components/Header.tsx
  const menus = [
    { href: "/", name: "Home" },
    { href: "/blog", name: "Blog" },
    { href: "/cheatsheets", name: "Cheatsheets" },
  ];

  const Header = () => {
    return (
      <header>
        {menus.map(({ href, name }, index) => (
          <Link
            key={href}
            href={href}
            className={classNames(" text-gray-900 dark:text-gray-100", {
              "ml-4 md:ml-8": index > 0,
            })}
          >
            {name}
          </Link>
        ))}
      </header>
    )
  }
  export default Header;
/components/Footer.tsx
  const Footer = () => {
    return (
      <footer>
        MDX blog with Nextjs
      </footer>
    )
  }
  export default Footer;
- Create new layout for your app at:
app/layout.tsx
/app/layout.tsx
import Header from "~/components/Header";
import Footer from "~/components/Footer";
export default function RootLayout({
  children,
}: {
  children: React.ReactNode;
}) {
  return (
    <html lang="en">
      <body>
          <Header />
          <main className="main">
            {children}
          </main>
          <Footer />
      </body>
    </html>
  );
}
Build new Home page
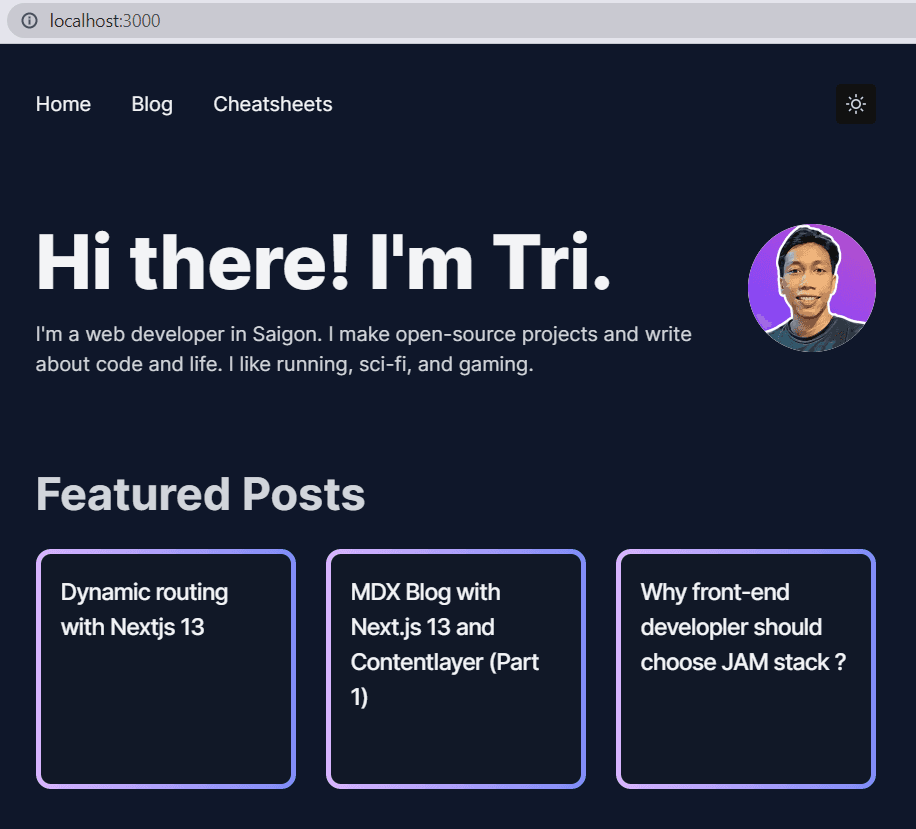
Now go to `app/page.ts and replace it with the code below.
/app/page.tsx
import ArticleCard from "~/components/ArticleCard";
import { allArticles } from "contentlayer/generated";
export default async function Page() {
  return (
    <div className="flex flex-col justify-center items-start max-w-2xl lg:max-w-3xl mx-auto pb-16">
      {allPosts.map((post) => {
        return (
          <ArticleCard key={post.slug} {...post}/>
        )
      })}
    </div>
  );
}
Create Article Card
Create the component
components/ArticleCard.jsx and populate with code below..components/ArticleCard.tsx
function FeaturedPosts({title,url}) {
  return {
    <Link
      className="transform hover:scale-[1.01] transition-all rounded-xl w-full md:w-1/3 bg-gradient-to-r p-1 from-[#D8B4FE] to-[#818CF8]"
      href={url}
    >
      <div className="flex flex-col justify-between h-full bg-white dark:bg-gray-900 rounded-lg p-4">
        <div className="flex flex-col md:flex-row justify-between">
          <h4 className="text-lg md:text-lg font-medium mb-6 sm:mb-10 w-full text-gray-900 dark:text-gray-100 tracking-tight">
            {title}
          </h4>
        </div>
      </div>
    </Link>
  }
}
You can see that we are mapping through data and displaying it in the component.
This data, however, is passed down from the homepage below.

Create dynamic routes for articles [slug]
Notice that if you click on individual posts, you get a 404 error.
That's because we haven't created the pages for these posts. Let's do that!
Now we create the SingleArticle component, which will contain the individual contents and display the MDX content.
Create a page at
app/blog/[slug]/page.tsx and add the following code.app/blog/[slug]/page.tsx
import { notFound } from "next/navigation";
import { allPosts } from "contentlayer/generated";
import type { Metadata } from "next";
const PostLayout = ({ params }: { params: { slug: string } }) => {
  const post = allPosts.find(
    ({ url }) => url.replace("/blog/", "") === params.slug
  );
  if (!post) {
    notFound();
  }
  return (
    <>
      <article className="mx-auto max-w-2xl w-full pt-10 pb-16 prose md:prose-md dark:prose-dark">
        <h1 className="mb-2">{post.title}</h1>
        <div className="cl-post-body" dangerouslySetInnerHTML={{ __html: post.body.html }} />
      </article>
    </>
  );
};

export async function generateStaticParams() {
  return allPosts.map((post) => ({
    slug: post.url,
  }));
}

export default PostLayout;
In the above code, we import
allPosts then, we look at each slug to match it with its corresponding resource and pass it on our page as props.
We also use generateStaticParams to define the list of route segment parameters that will be statically generated at build time,
you can read more about dynamic routing on this post.Now clicking on a post link from the home page should lead you to a working post page.
Next Steps
You now have a simple blog site with Next.js 13 and Contentlayer! 🎉.
Next you can create more content type, add styling and make your blog more beautiful.